A Theme Installation
Theme installation via WordPress admin
Log into your WordPress admin area first.
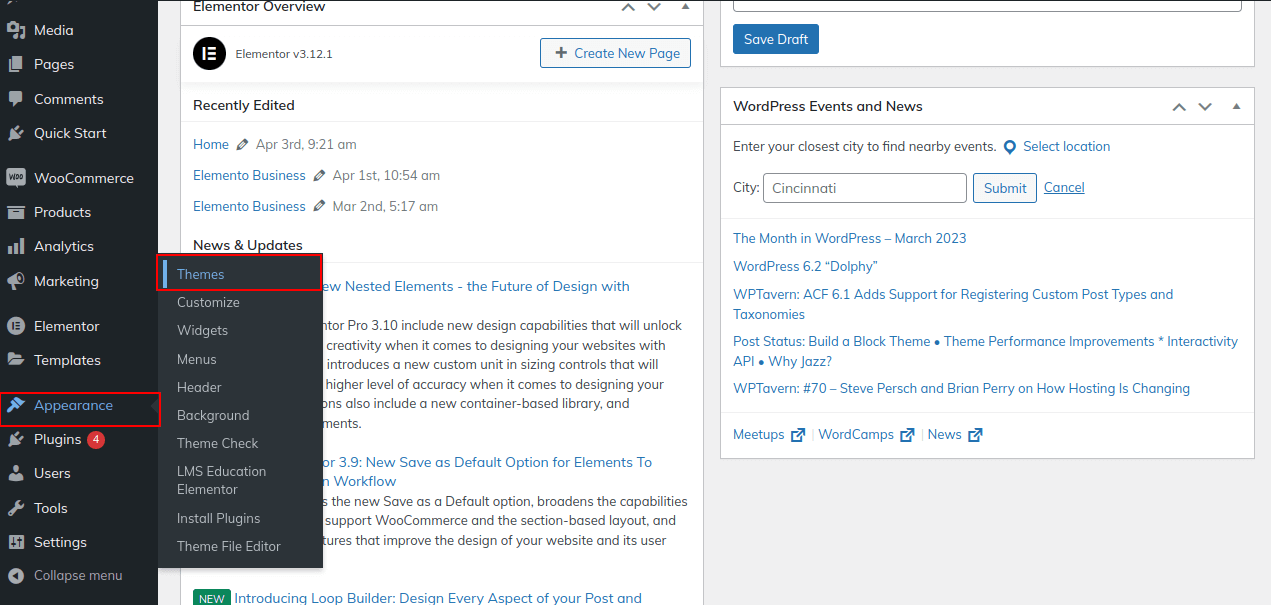
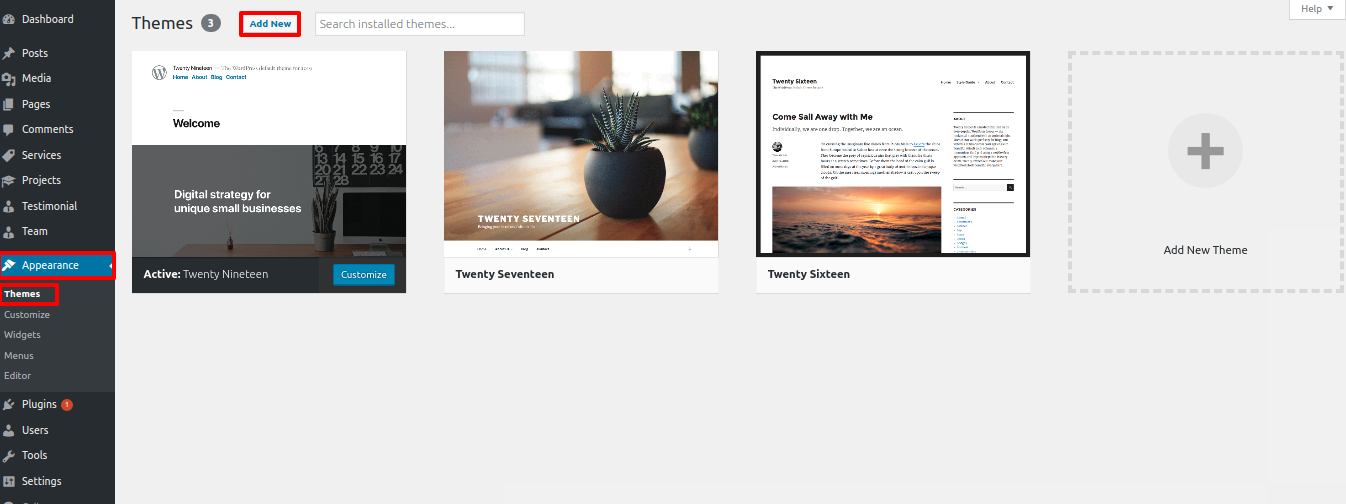
1.Click on Appearance Themes
2. You can add a new theme on the themes page by clicking the Add New button.
3. Click Browse and select your medical-clinic-center.zip file.

4. Make sure your theme is installed and activated.

Plugin Installation.
The steps below will guide you through the installation of the required plugins:
Go to Appearance Install Plugins
Mizan Demo Importer Plugin ,Contact Form 7, Happy Addons for Elementor and Prime Slider – Addons For Elementor
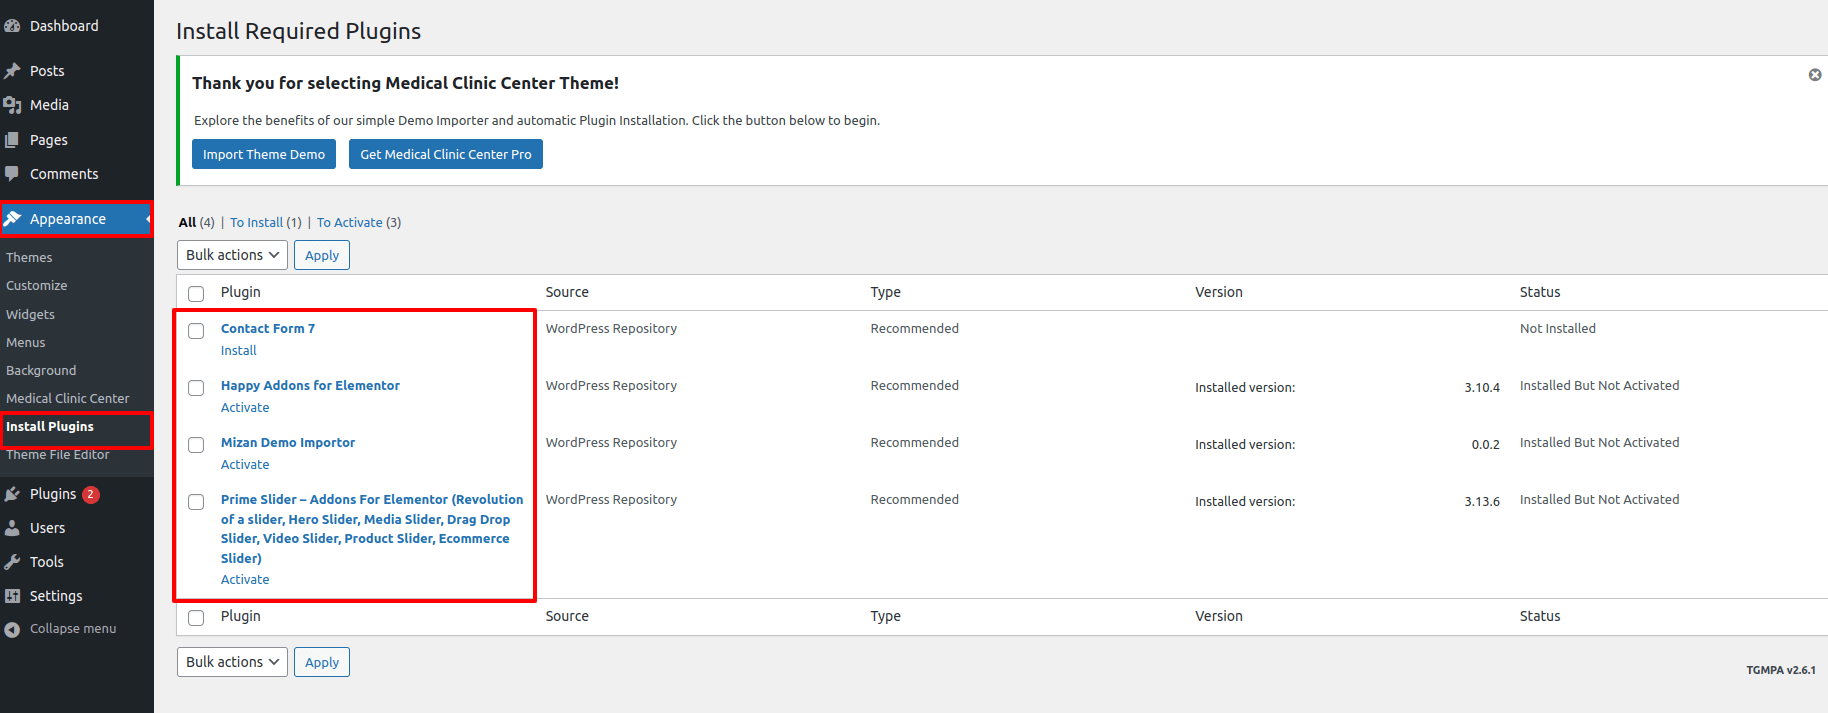
Install the plugin and activate it by clicking the Install now button.
Theme Setup
Here are the steps for importing content.
1) Click Dashboard Appearance Medical Clinic Center
click on Install/Activate button
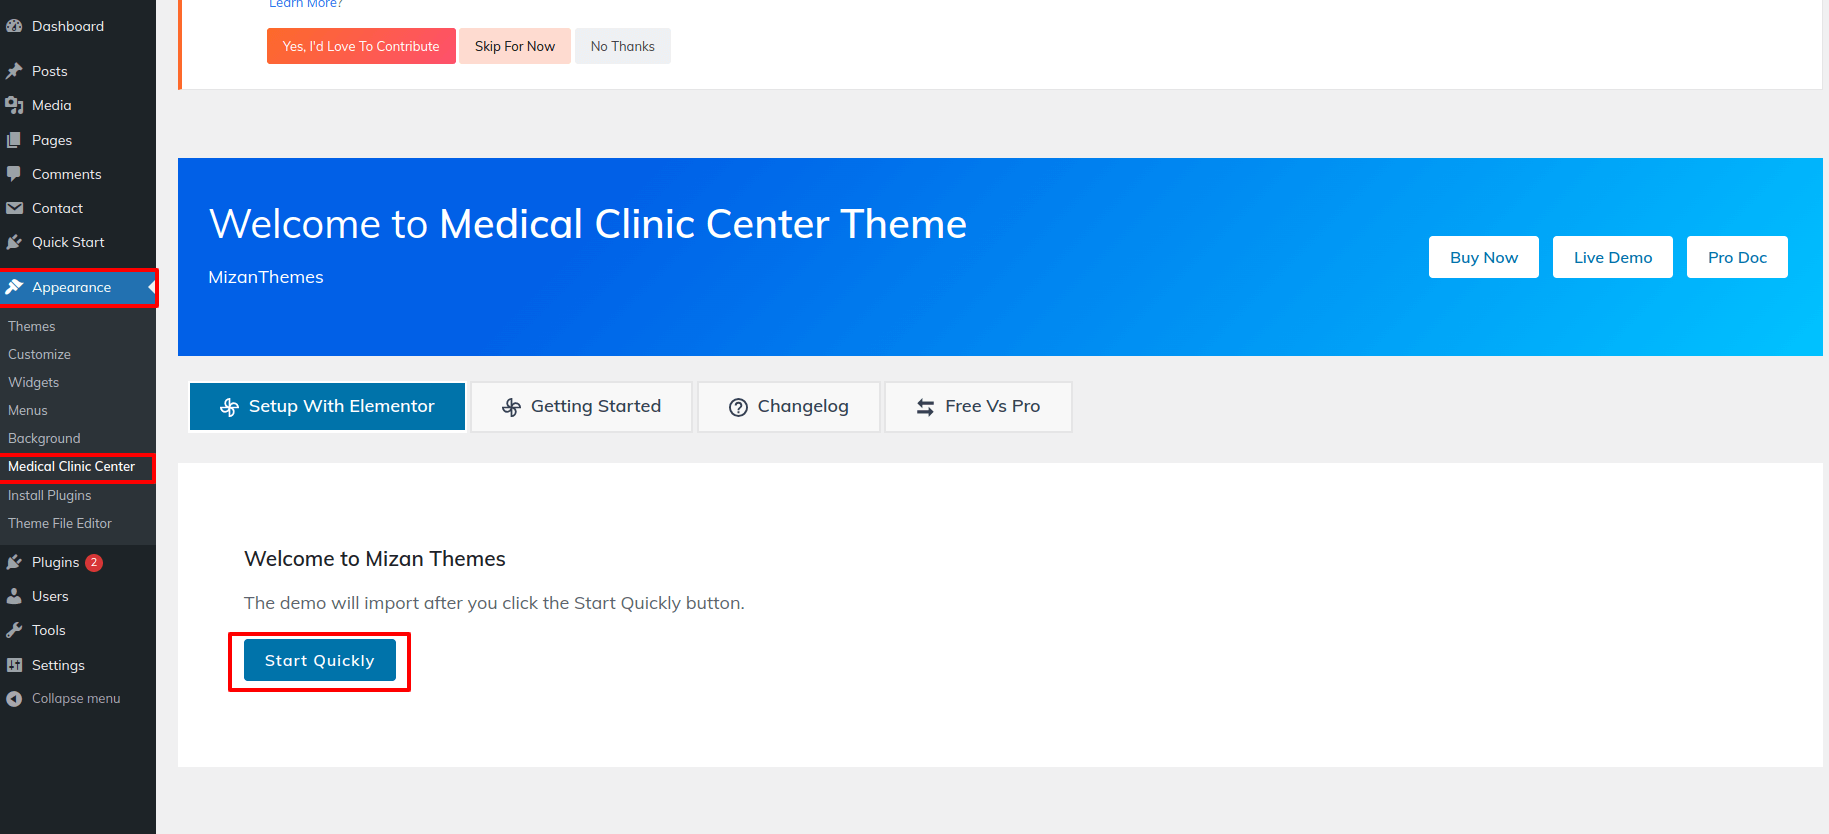
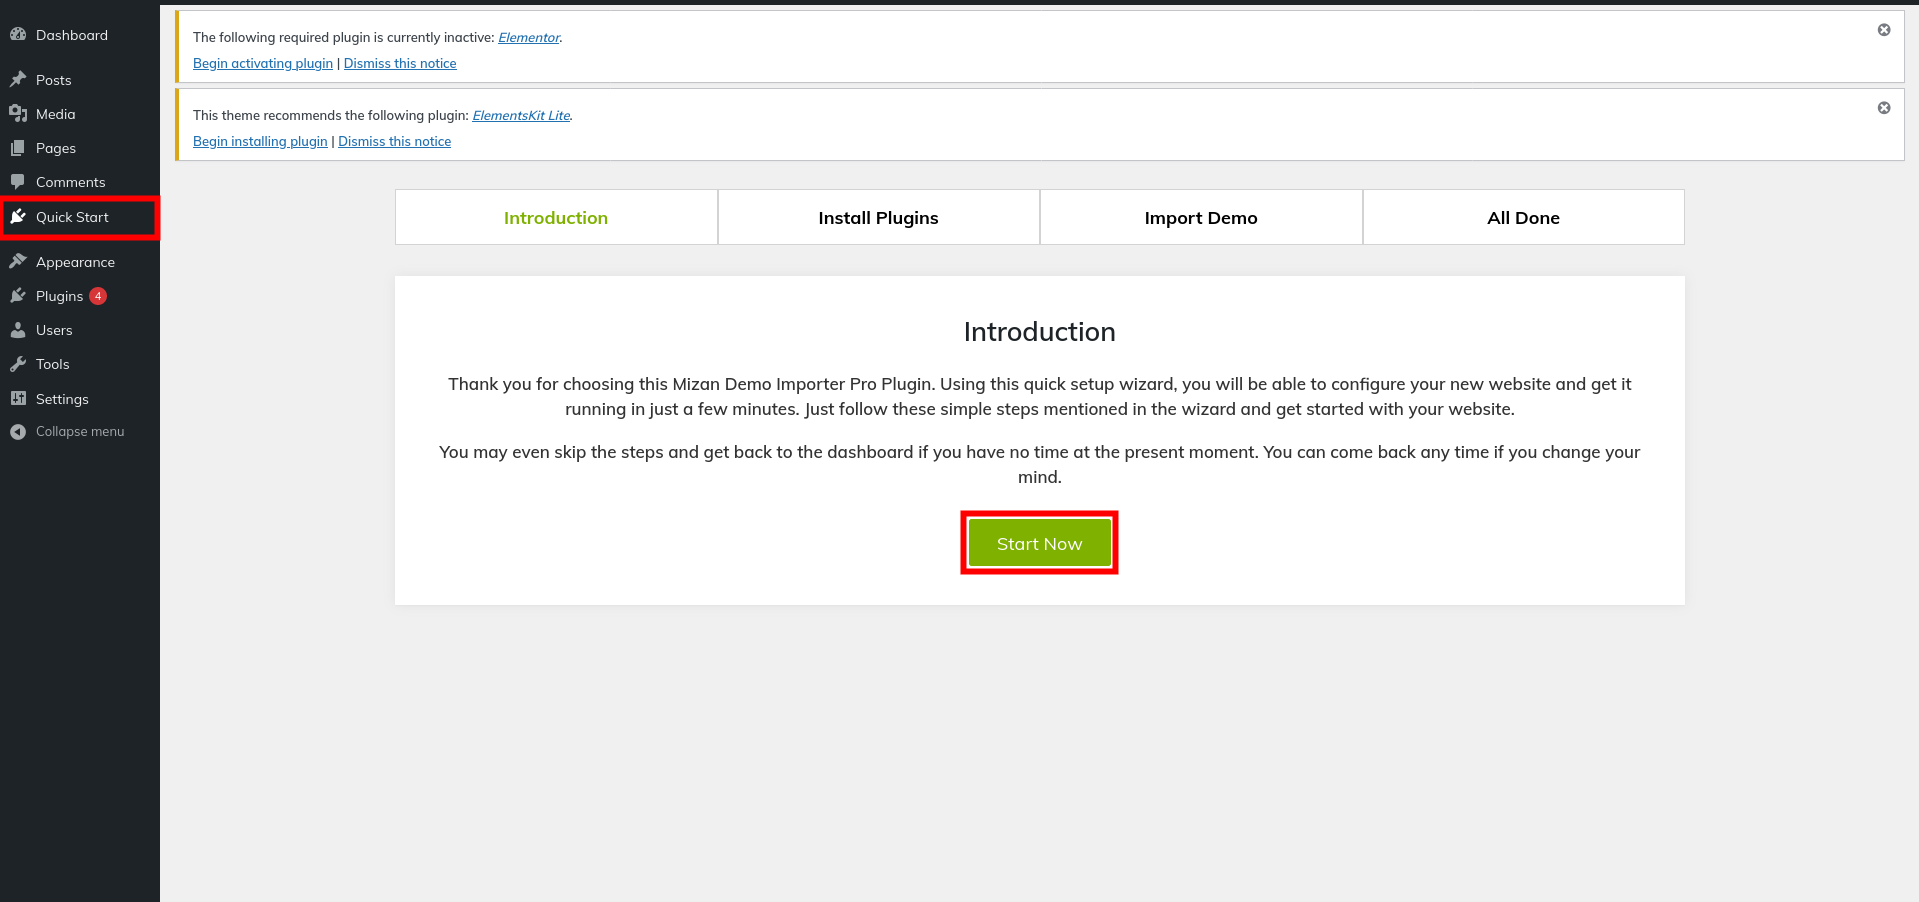
To get started, click on Start Now button
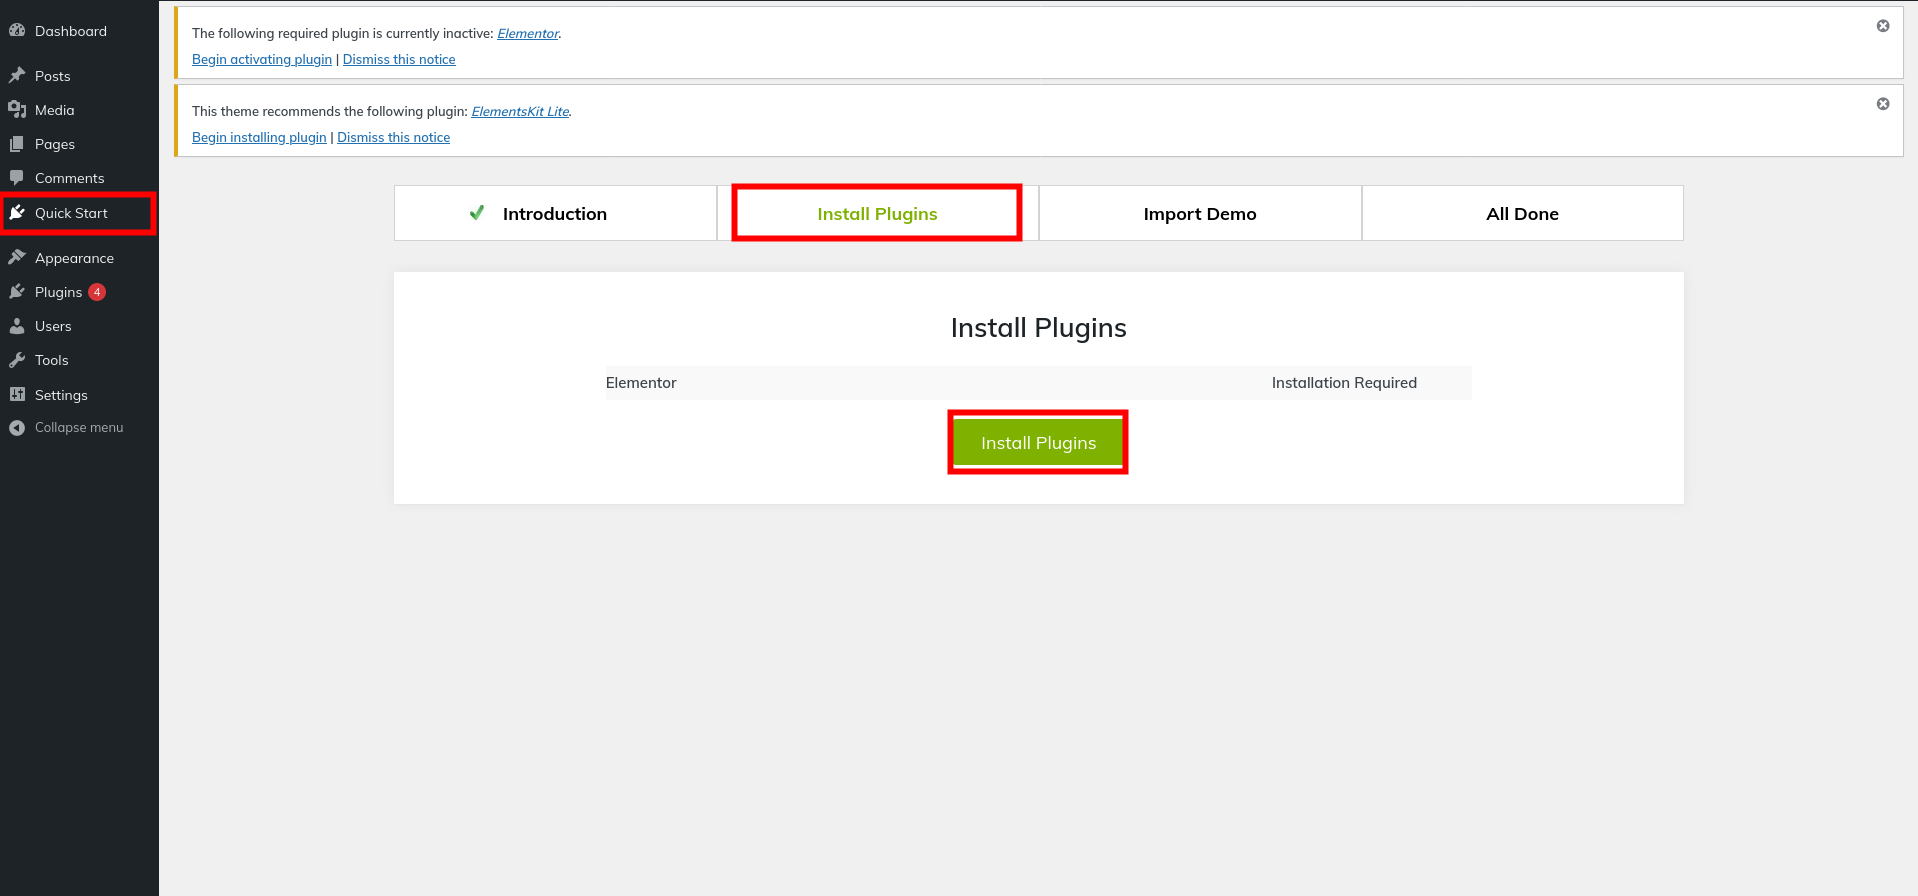
2) Start installing and activating the plugins by clicking on the install plugins button.
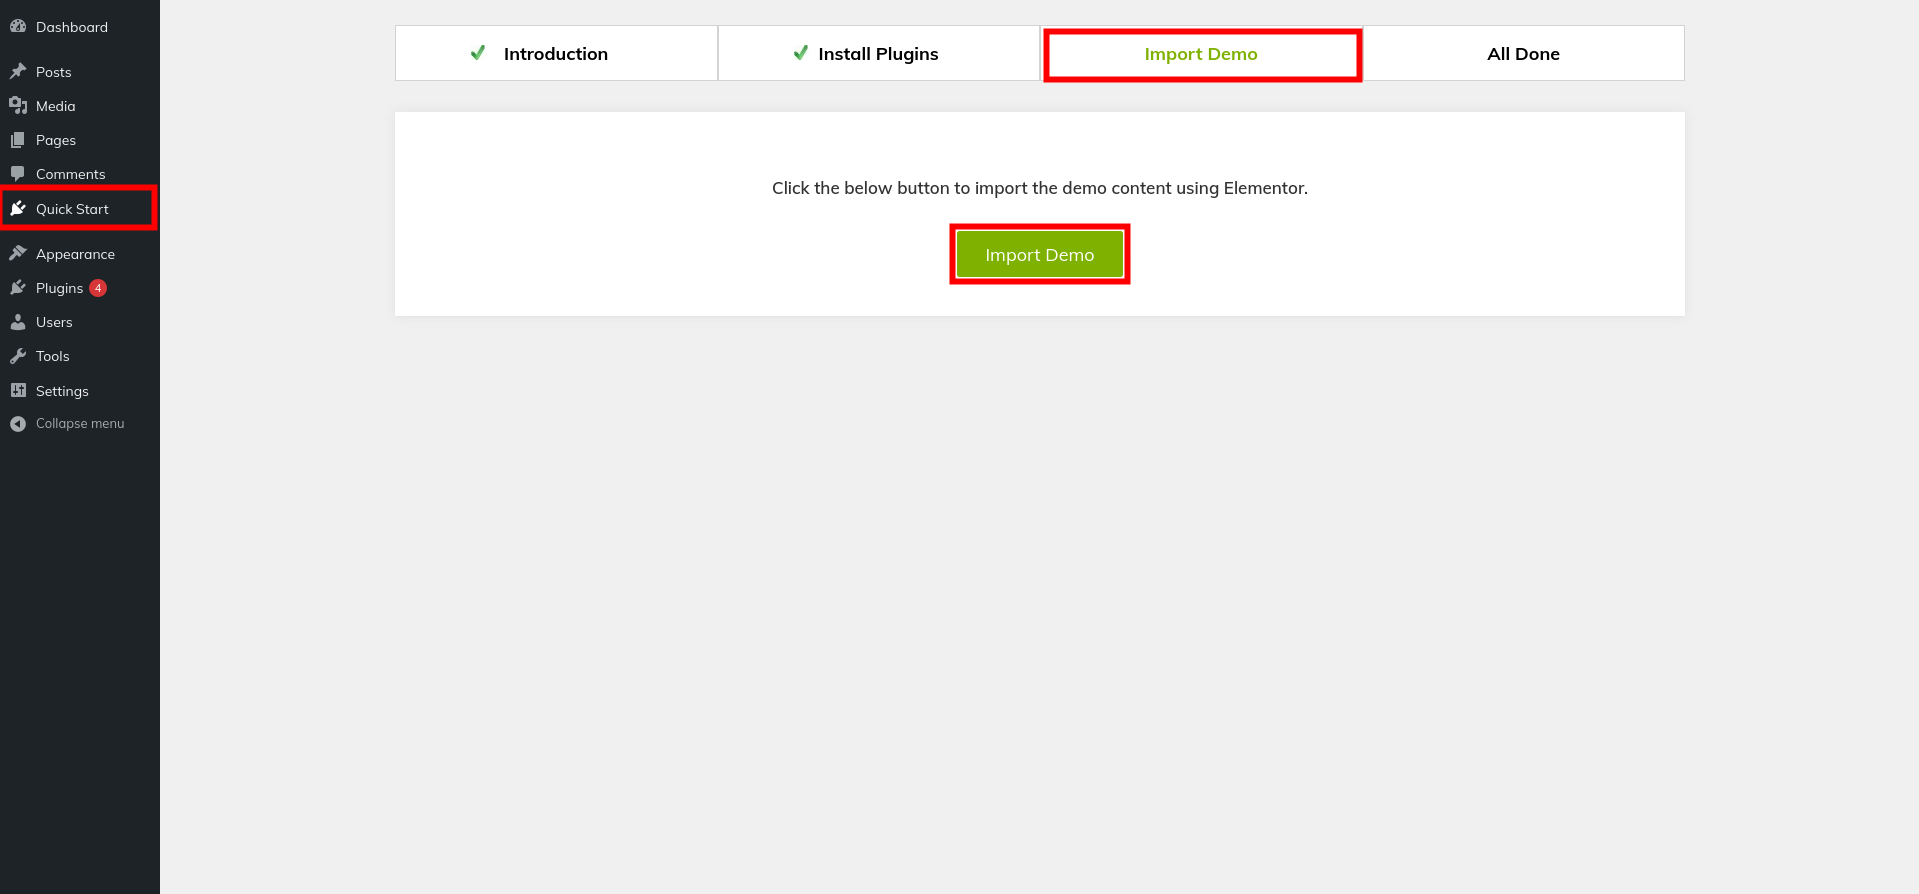
3) Click on Import Demo to begin importing the demo.
4) To visit your site, click the Visit Your Site button.
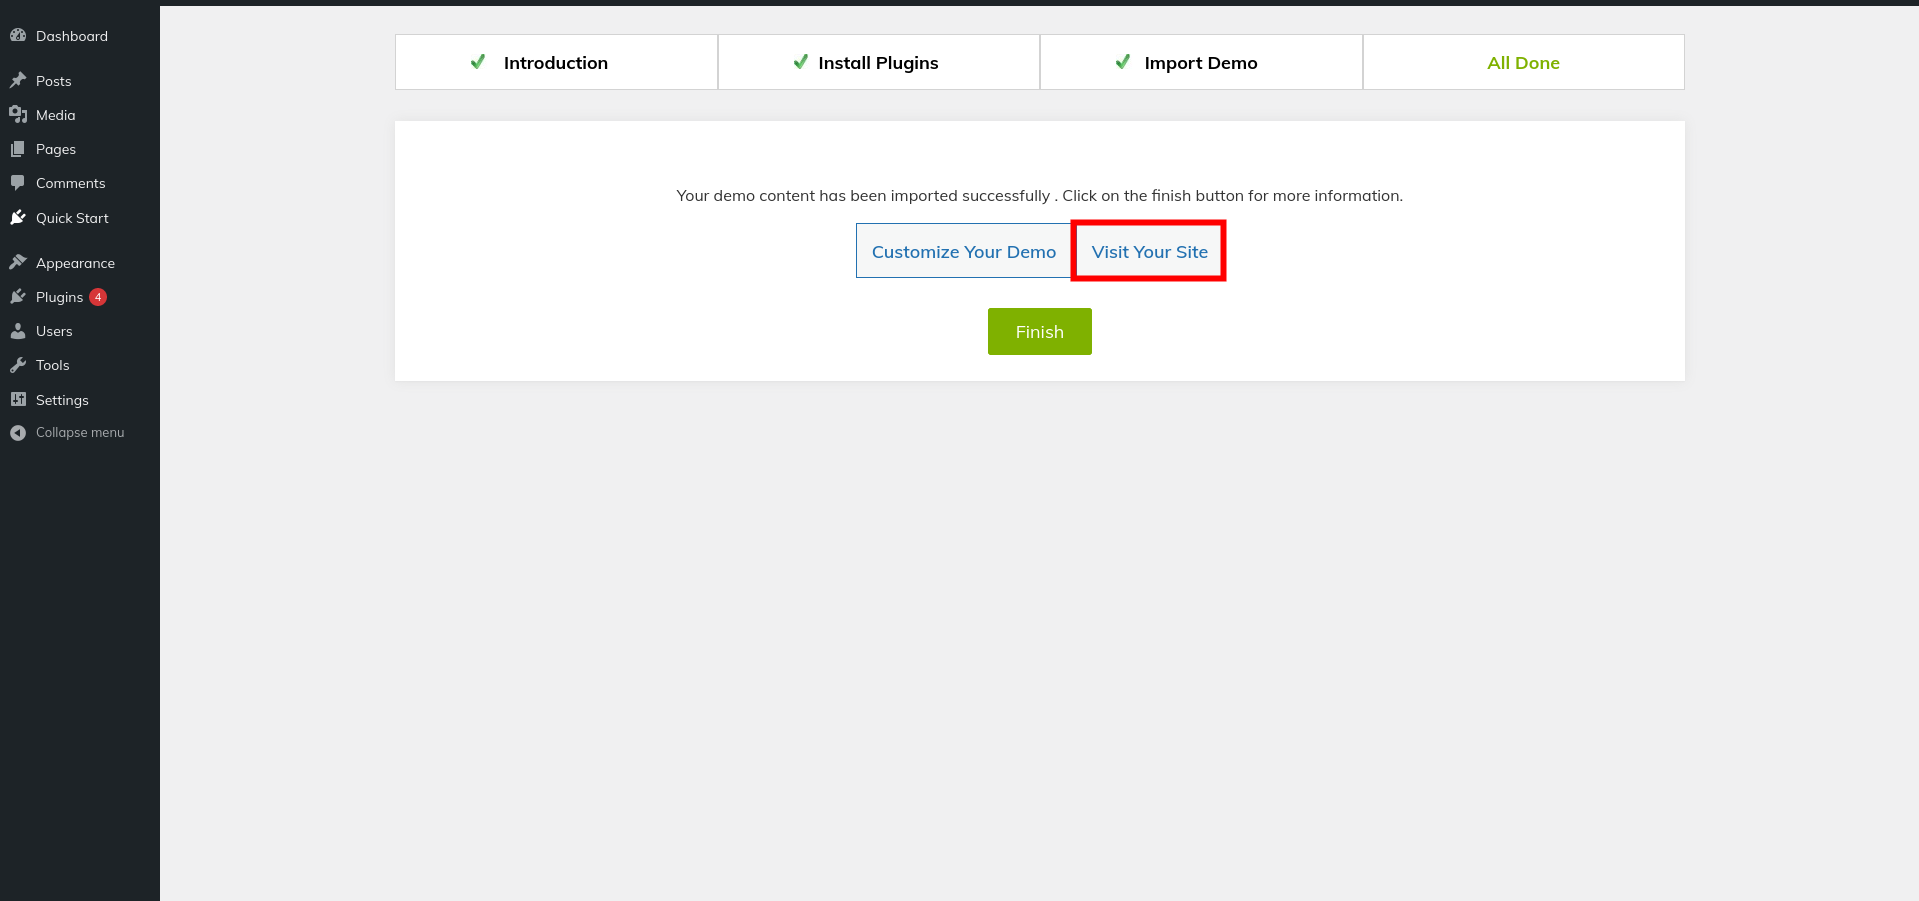
5) You can now visit your website.
Menus Settings
1. Create pages >>Go to Dashboard Pages Add New Page
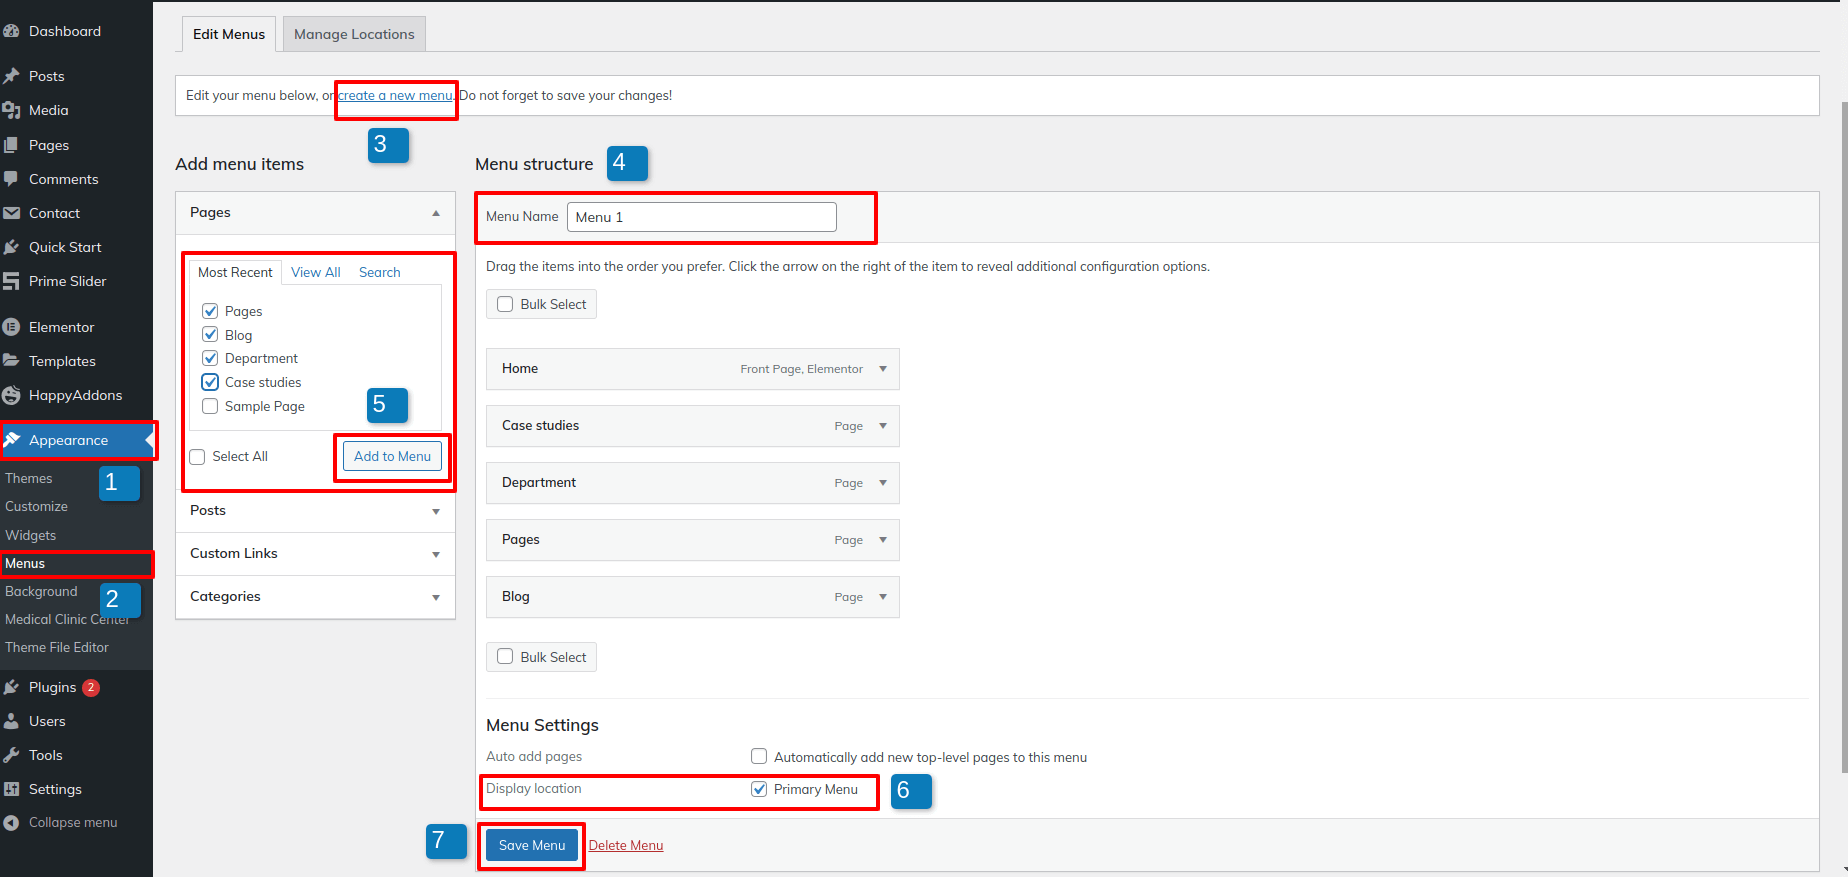
2. Navigate to Appearance Menus
3. To Create a new menu, click on create a new menu link.
4. Give your menu a name in the Menuname, then click the Save Menu link.
5. Once you have created menu, You must include pages by checking the appropriate boxes. You may arrange it once you've added the menu list by drop and drag.
6. selecting a menu theme location "Primary Menu" using the checkboxes below.
Logo Settings
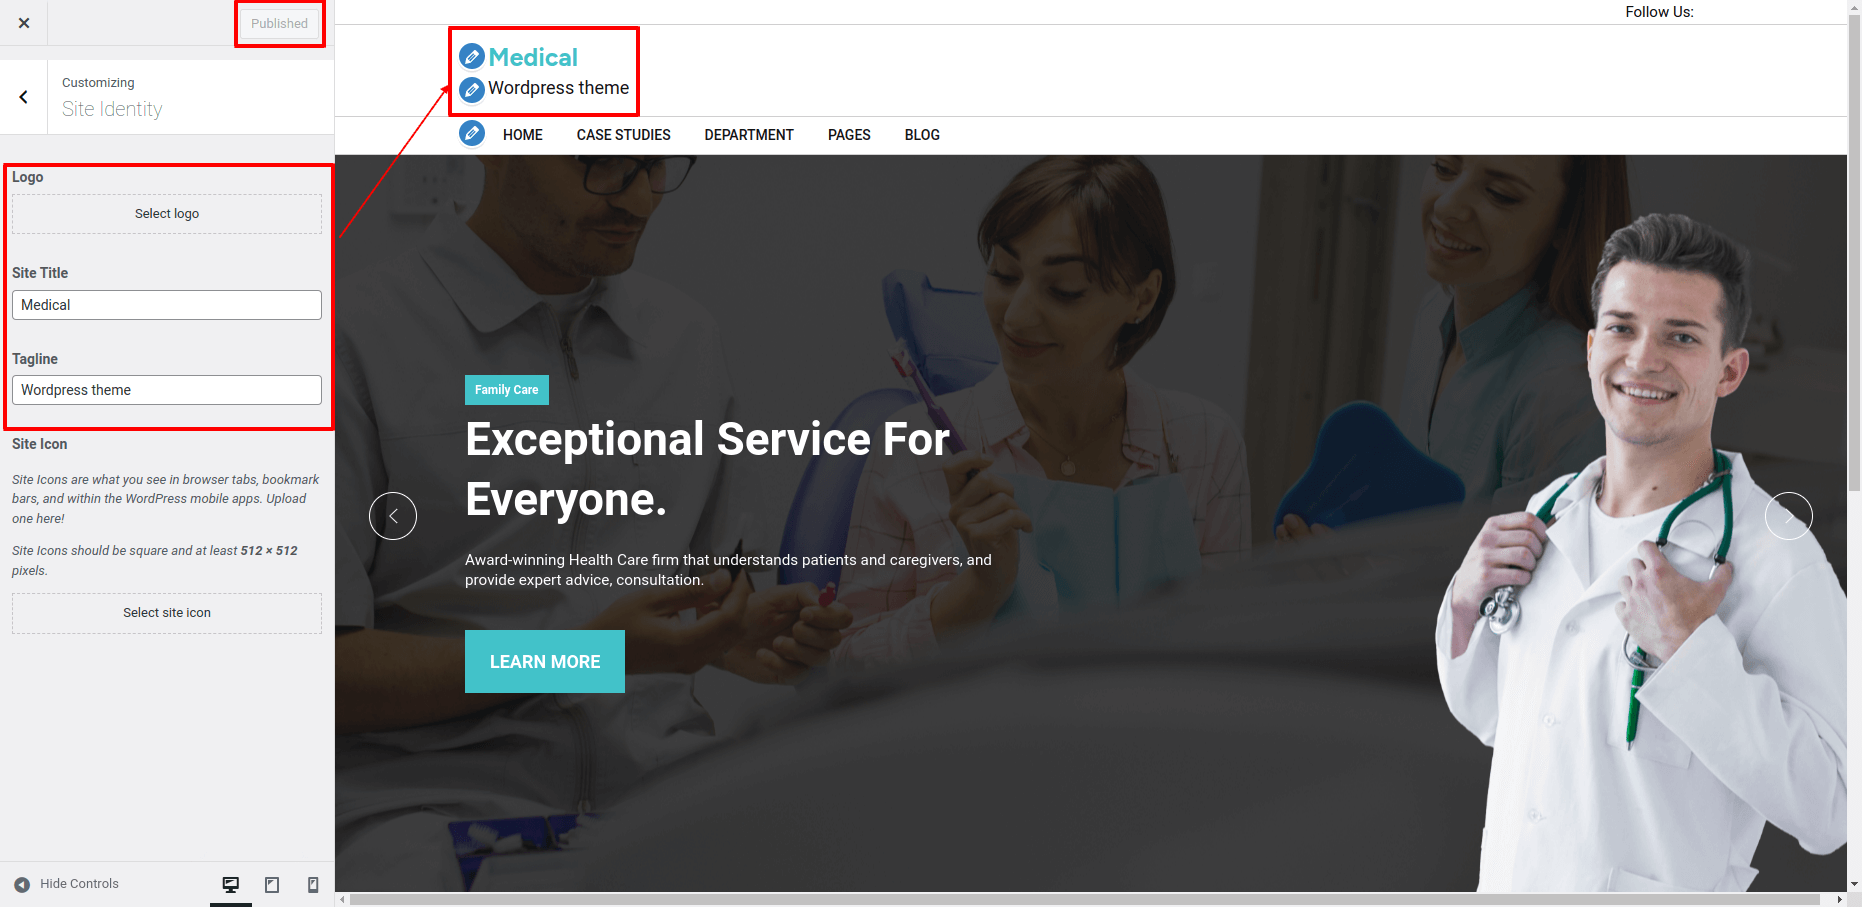
For the Site Identity Section, please click here
Go to Appearance Customize Site Identity
Adding the title and tagline of the site and enabling/disabling the title and tagline are possible here.
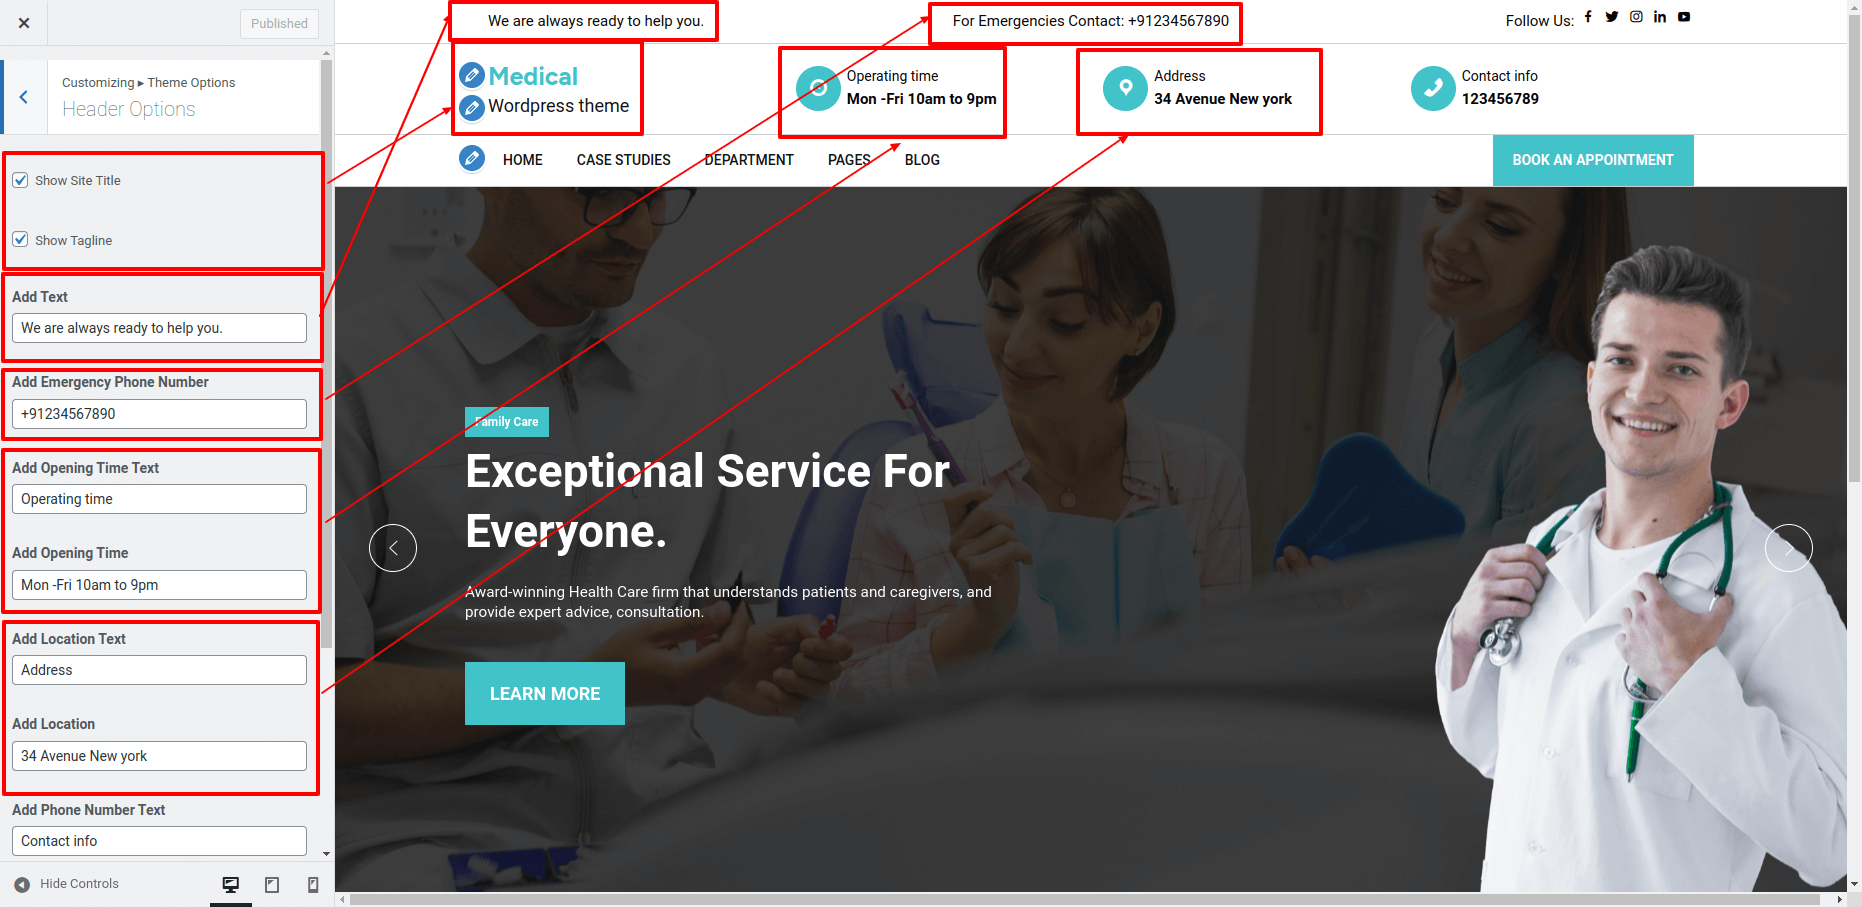
Header Settings
A) For the Header Section, follow these steps:
Go to Appearance Customize Theme Option Header Settings
1. Add Text: In this section, you have the option to add advertisement text.
2. Add Emergency Phone Number: In this section, you have the option to Add Emergency Phone Number.
3. Add Opening Time Text & Add Opening Time: There are option here for adding a Add Opening Time text and Add Opening Time.
4. Add Location Text & Add Location: There are option here for adding a Add Location text and Add Location.
5. Add Phone Number Text & Add Phone Number: There are option here for adding a Add Phone Number text and Add Phone Number.
6. Add Button Text & Add Button link: There are option here for adding a Button text and button link.

B) For the Social Icon:
Go to Appearance Customize Theme Option Social Media Options
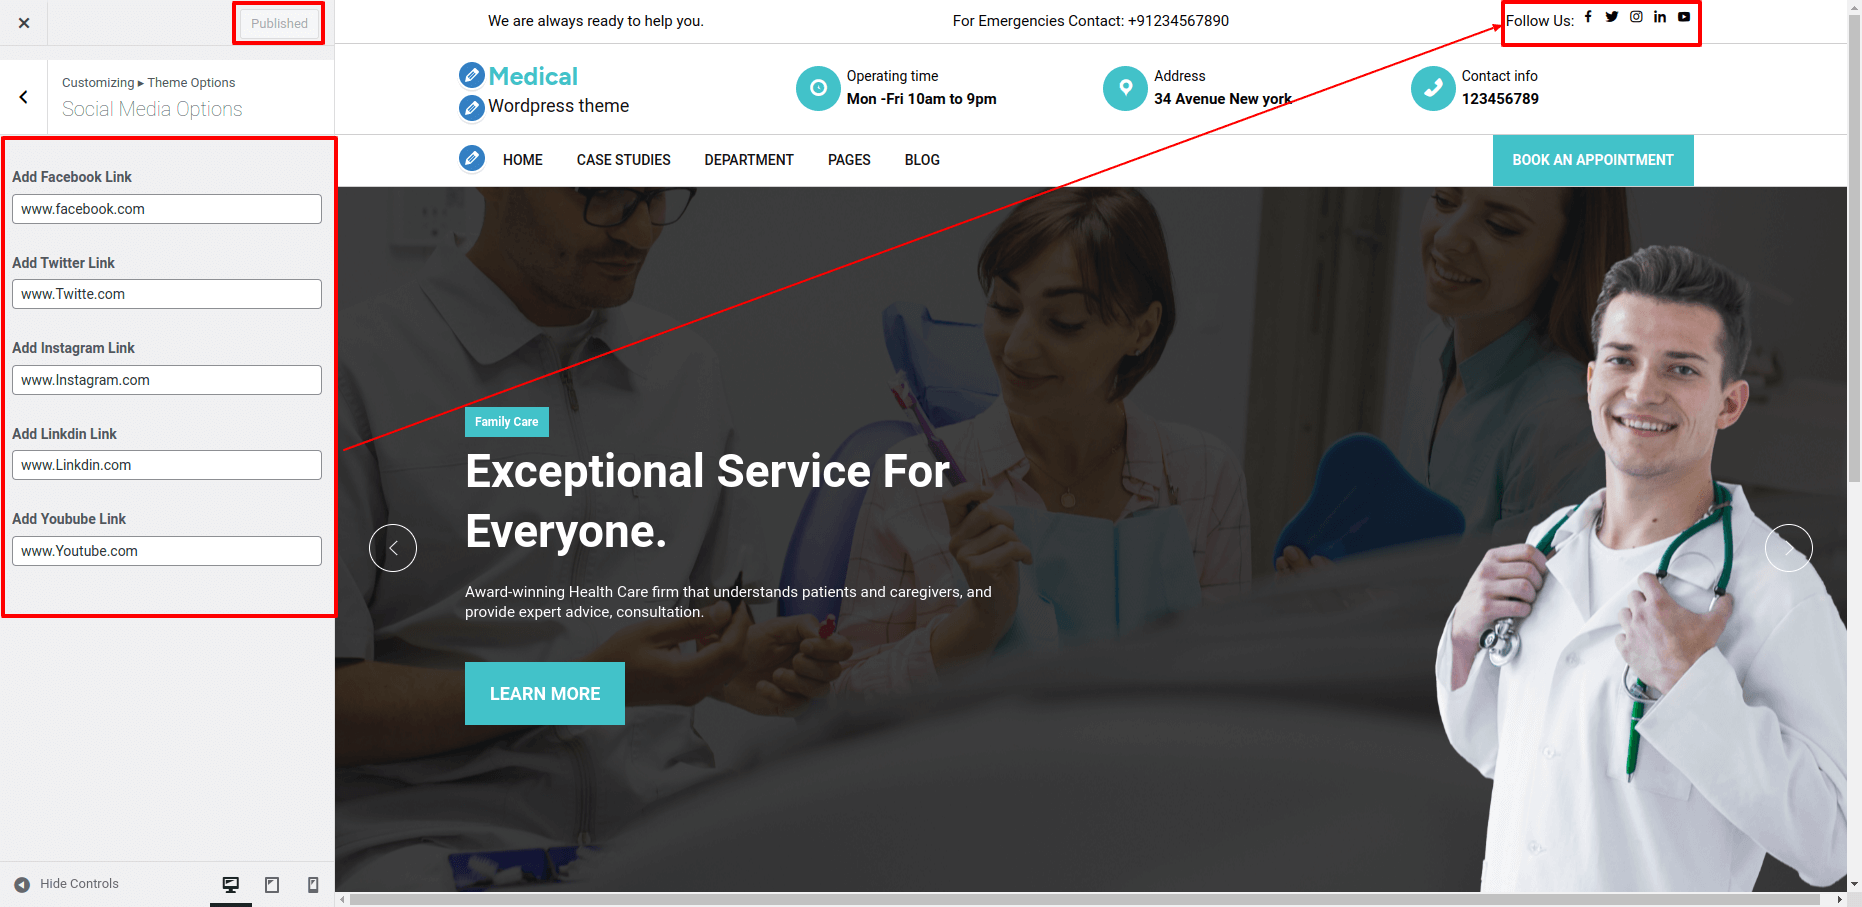
The header section can be added in this way.

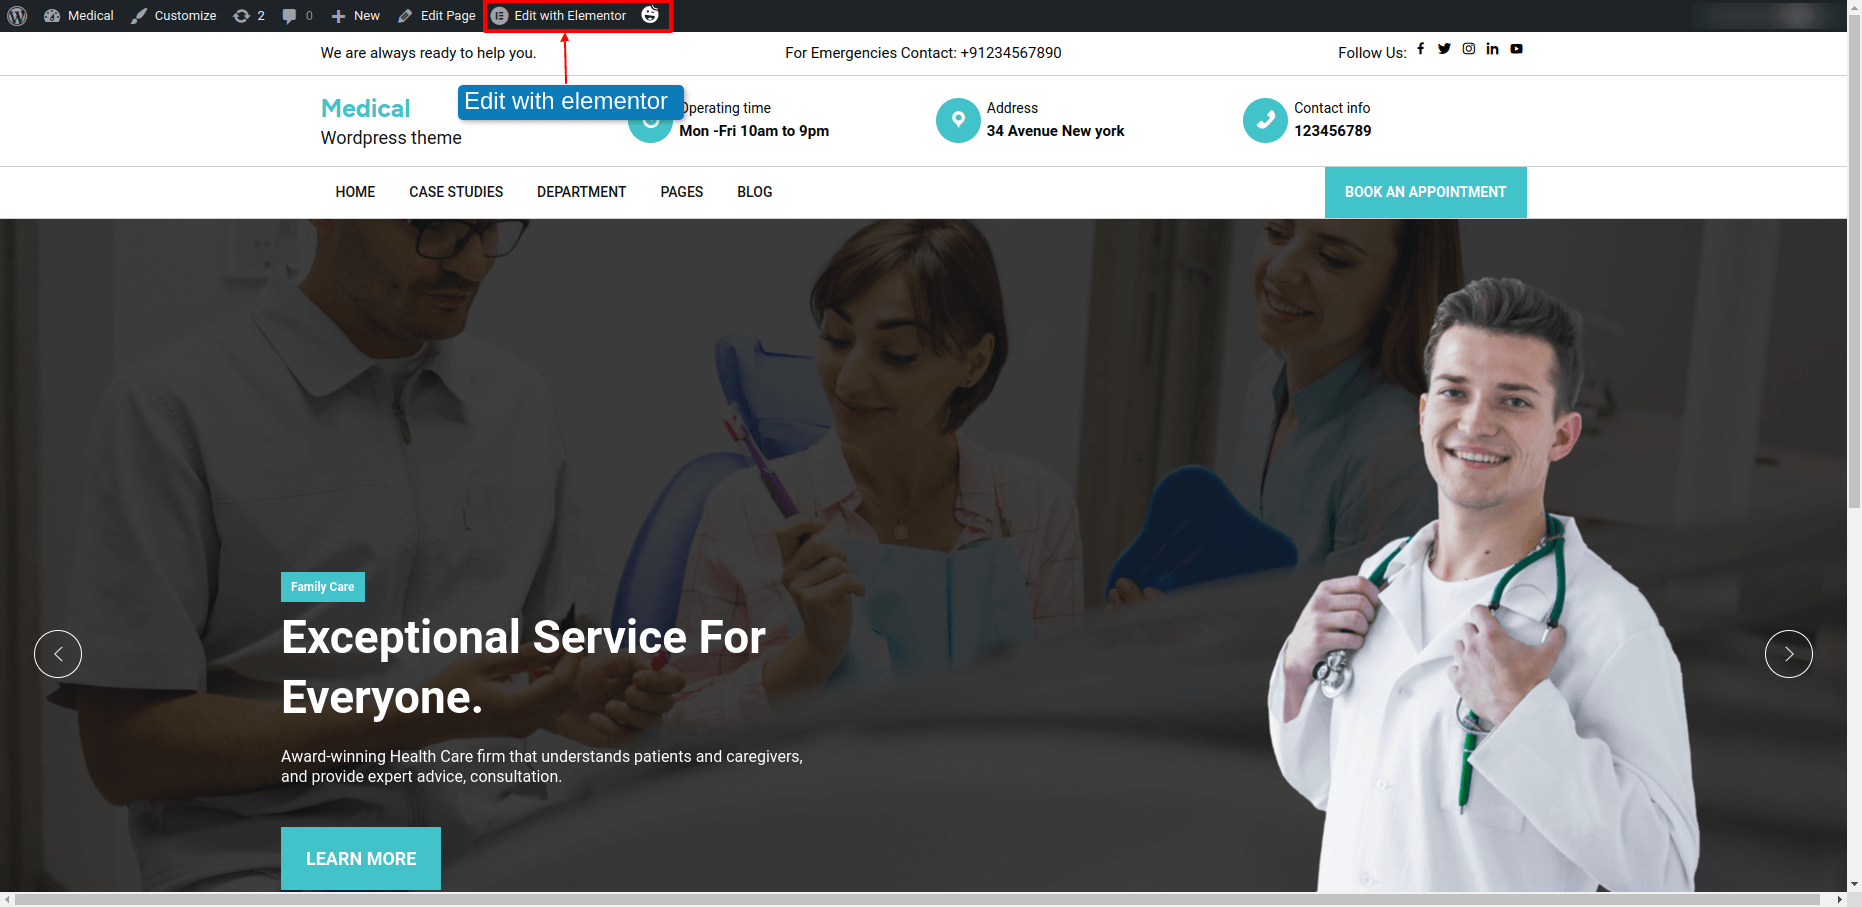
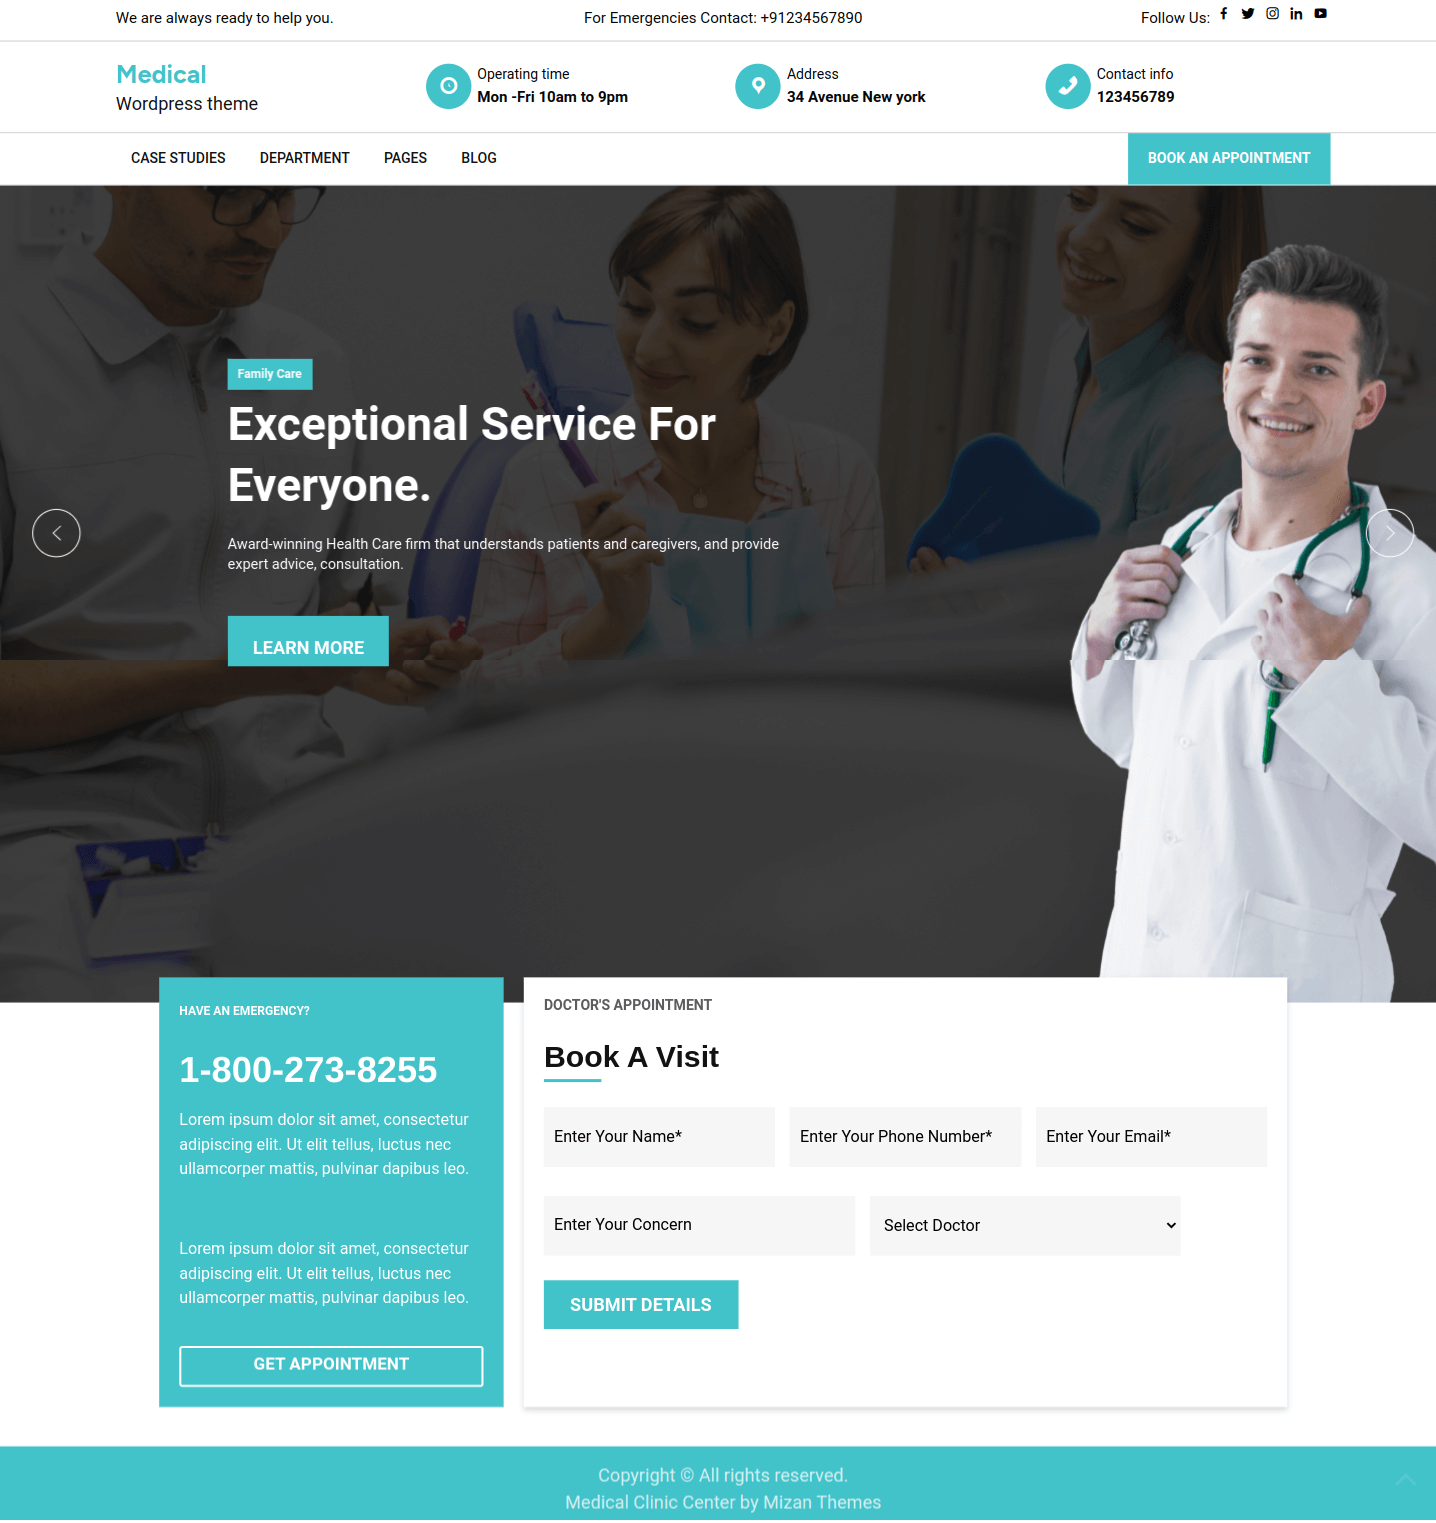
Home-page Settings
These instructions will guide you through the process of Editing Homepage.
Go to Homepage Edit With Elementor
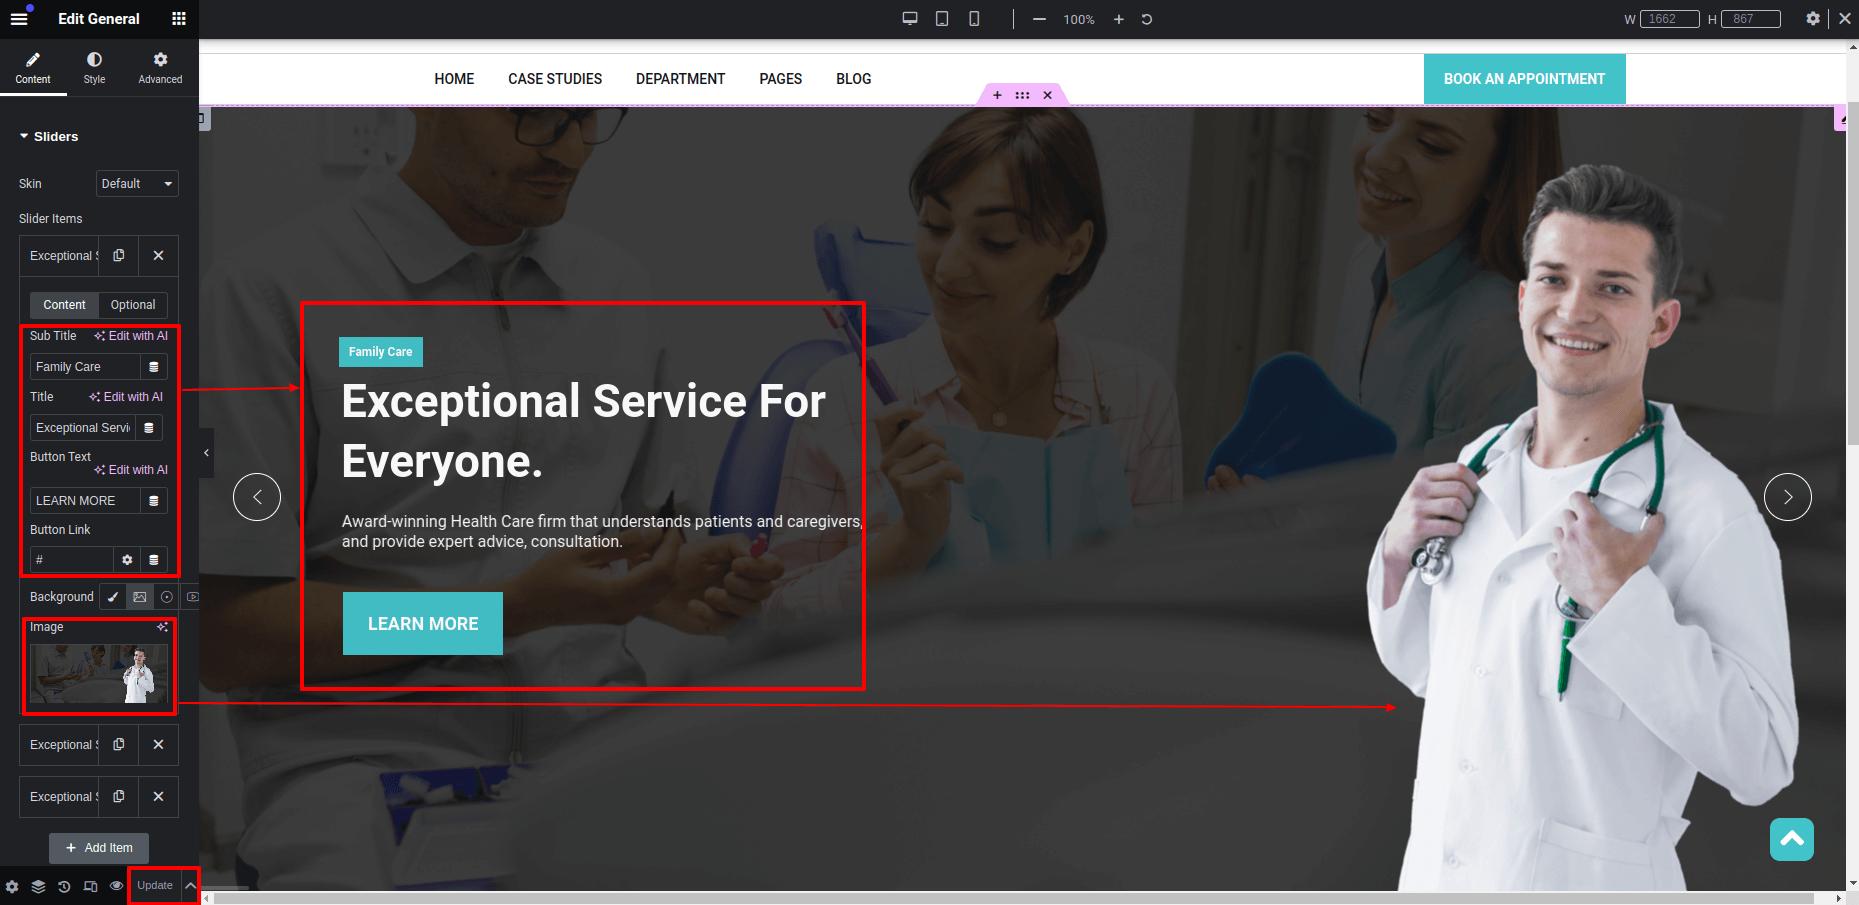
A)Edit Slider Section
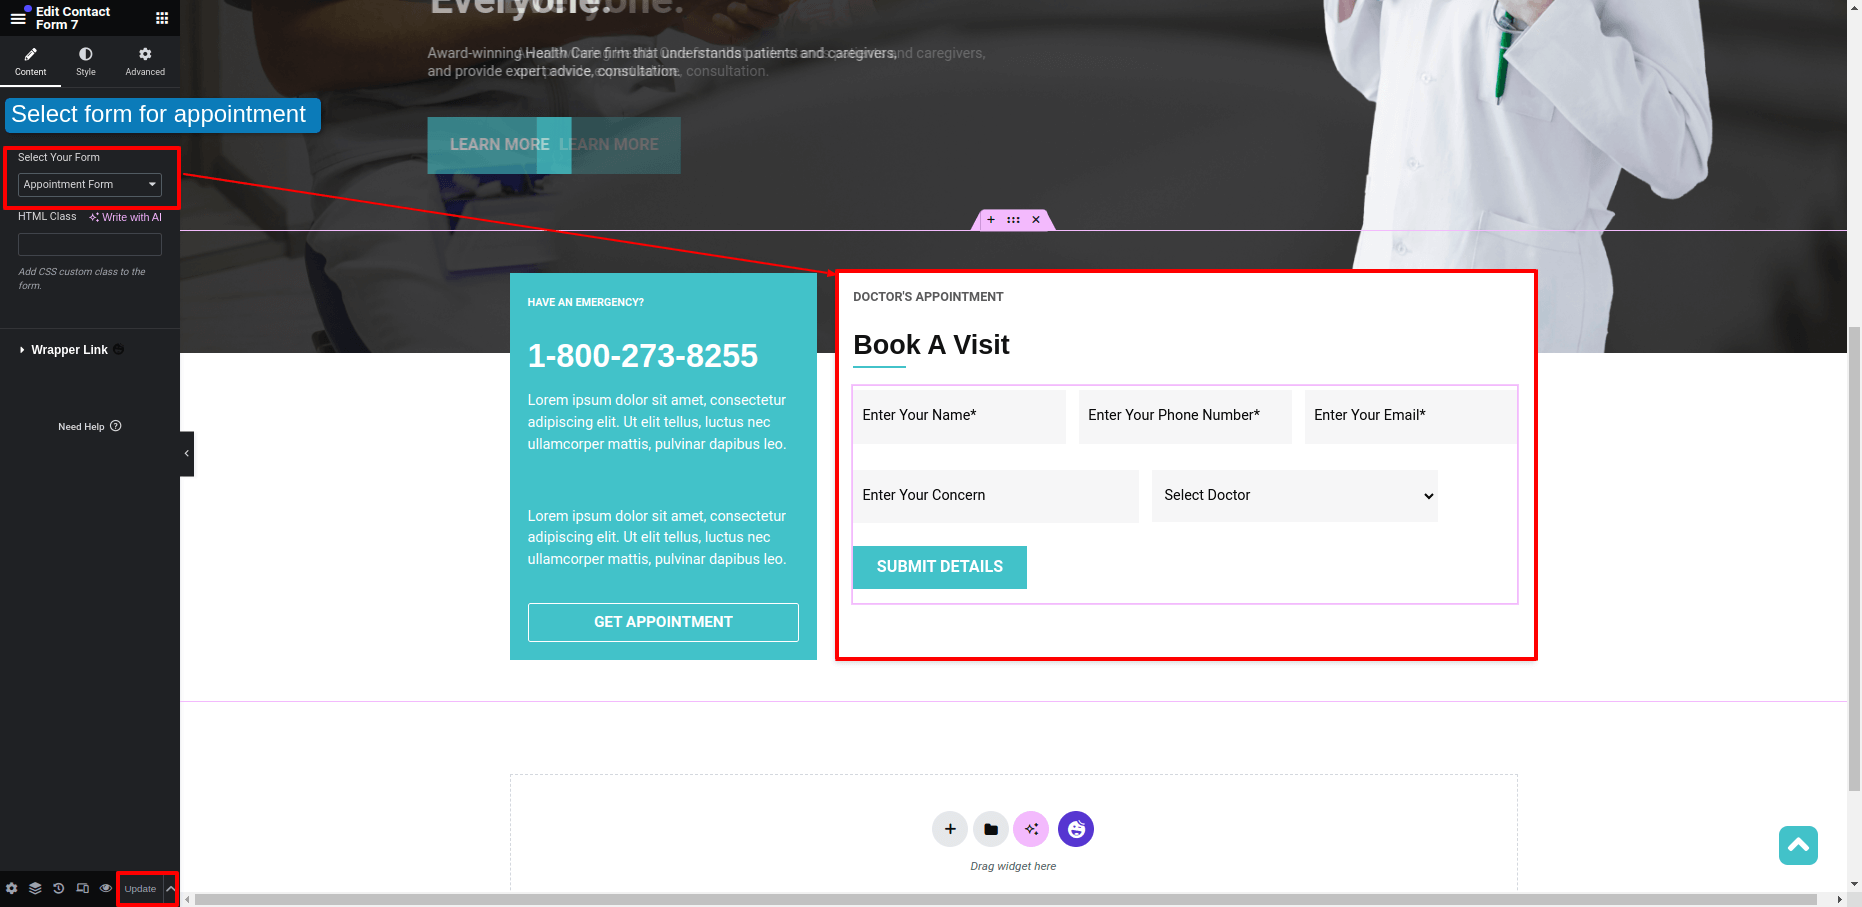
B)Edit Appointment Section
1. Create Form
Click Dashboard Contact Add new
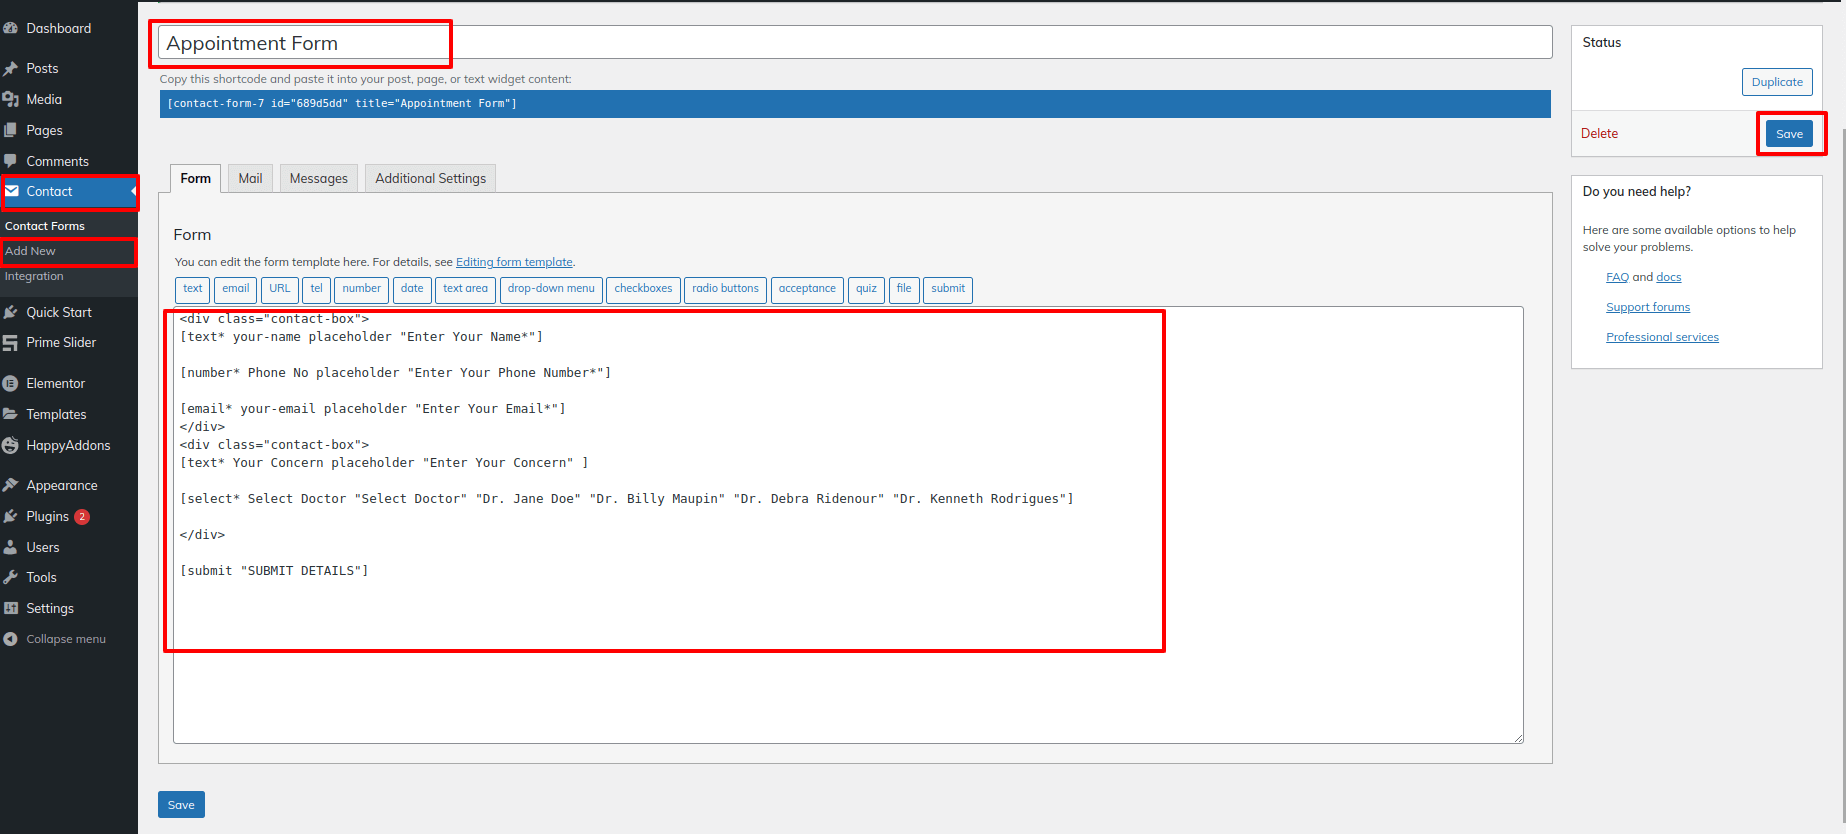
Refere below code for Appointment form
   <div class="contact-box">
   [text* your-name placeholder "Enter Your Name*"]

   [number* Phone No placeholder "Enter Your Phone Number*"]

   [email* your-email placeholder "Enter Your Email*"]
    </div >
   <div class="contact-box">
   [text* Your Concern placeholder "Enter Your Concern" ]

   [select* Select Doctor "Select Doctor" "Dr. Jane Doe" "Dr. Billy Maupin" "Dr. Debra Ridenour" "Dr. Kenneth Rodrigues"]

   </div>

   [submit "SUBMIT DETAILS"]
Now Select an Appointment form
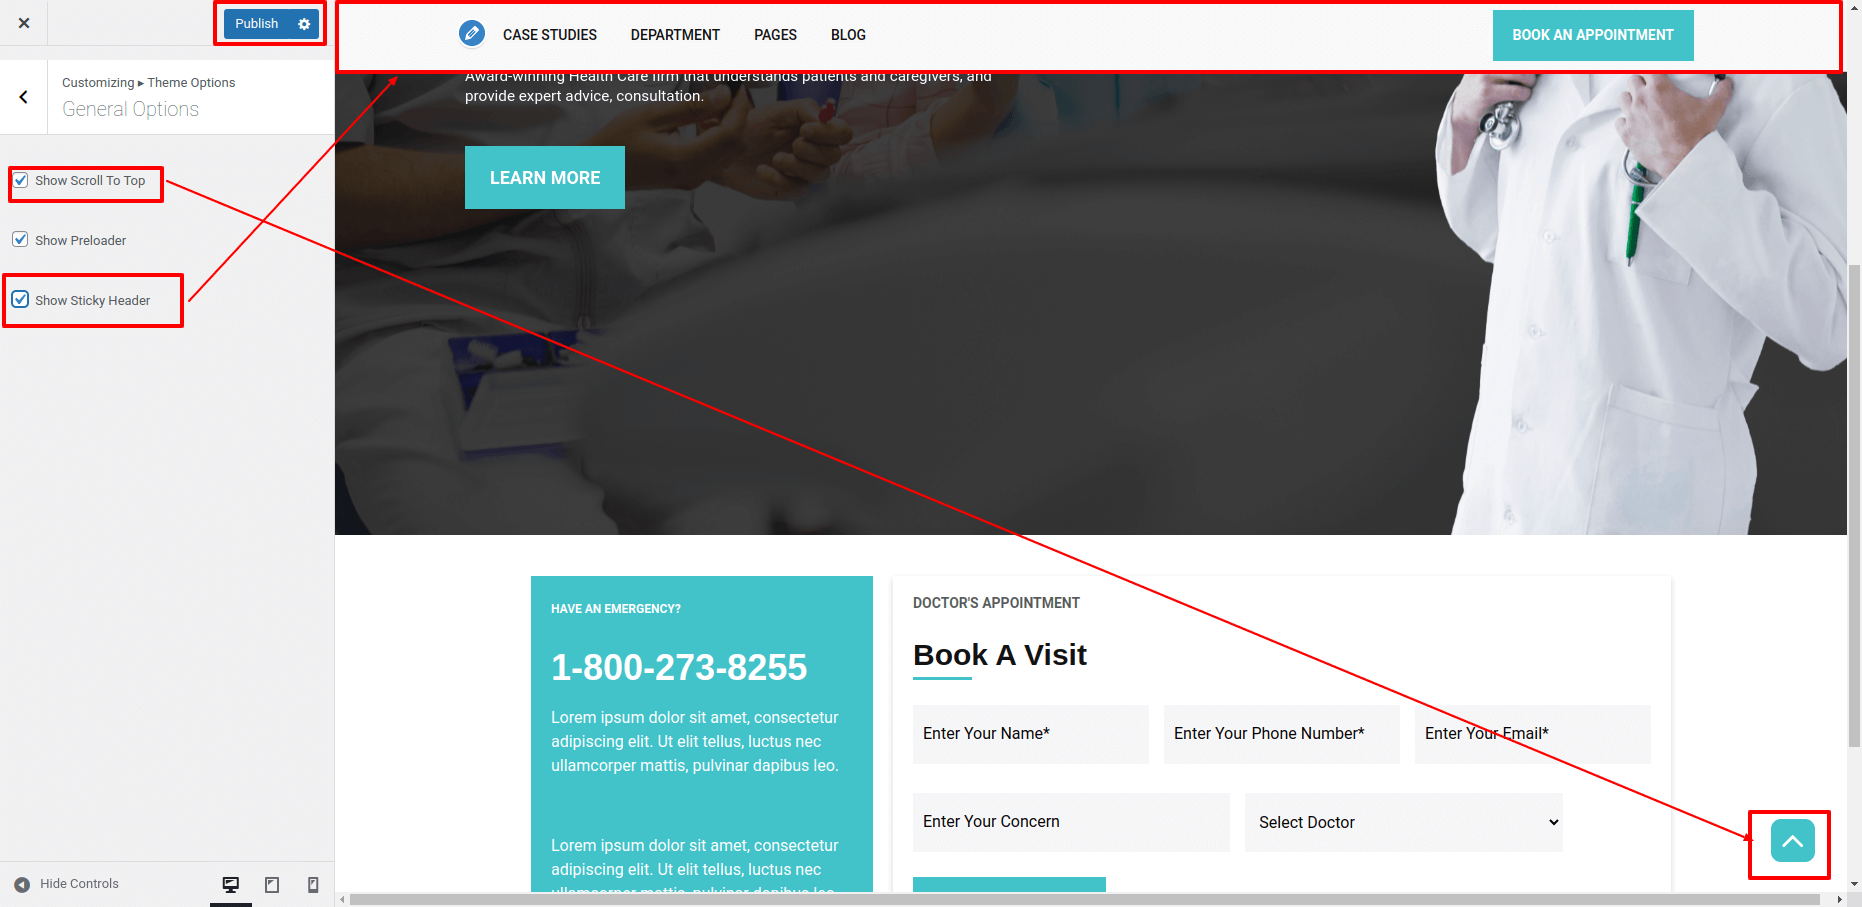
General Options
Go to Appearance Customizer Theme Options General Options
1. Show/hide Scroll To Top.
2. Show/hide Preloader.
3. Show/hide Sticky Header.
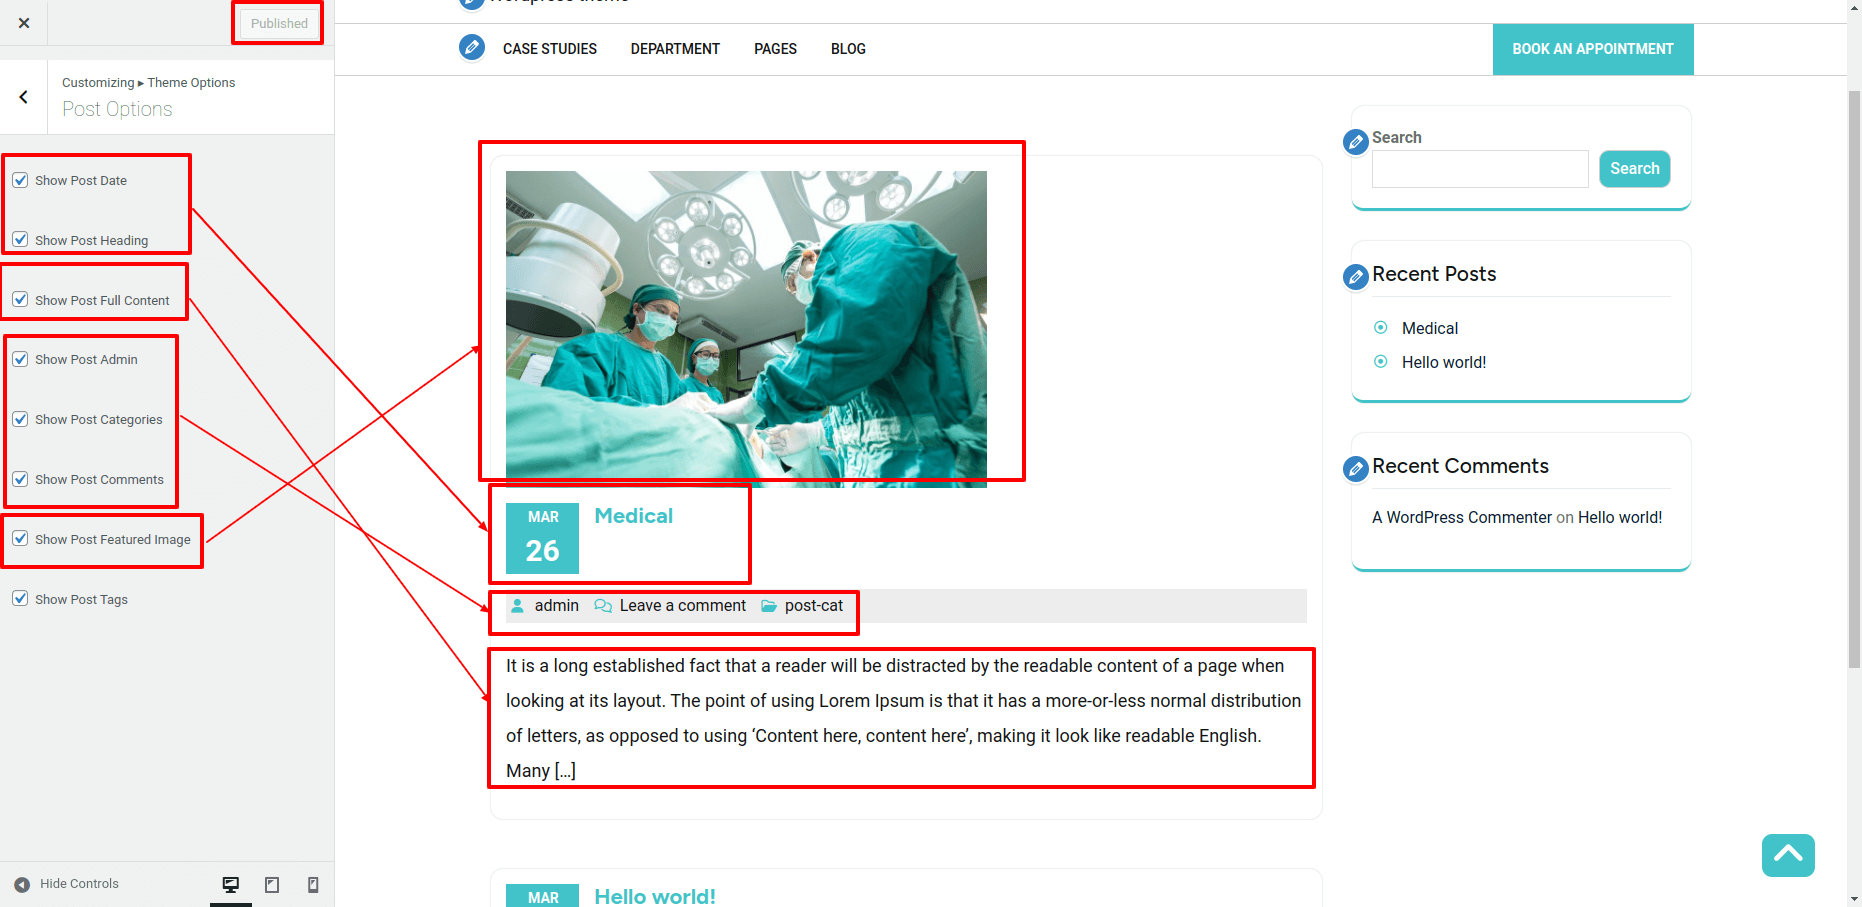
Post Options
Go to Appearance Customizer Theme Options Post Options
1. Show/hide Post Date.
2. Show/hide Post Heading.
3. Show/hide Post Full Content.
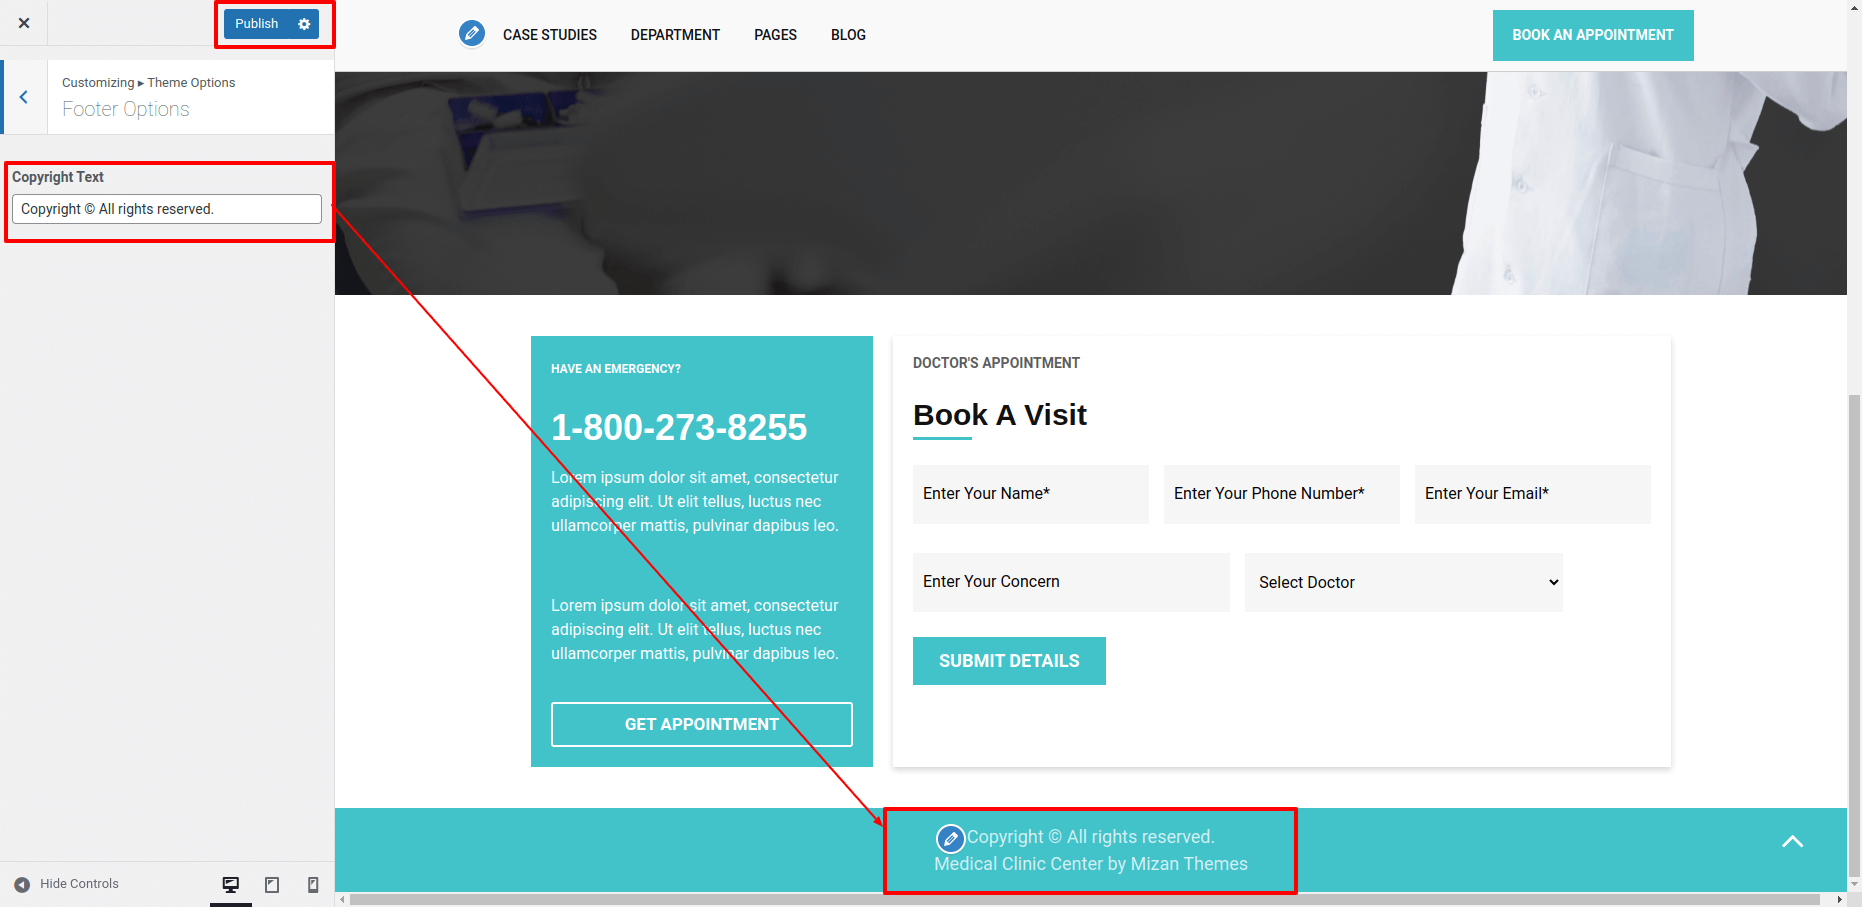
Footer Settings
Follow these instructions for setting up a footer.
Appearance Customizer Footer Option
The text of the Copyright can be changed here.
Footer Copyright Text.